Friday, June 27, 2008

Video Tutorial 2

This is second part of video tutorial. In first part we have prepared the SL Viewer for Capture Video, i will now show you how to capture the video. There are plenty software for doing video screen capture. See wiki article Recording Movies

I've tested and compared the Windows freeware applications referenced there :
Taksi
CamStudio
WeGame
plus
VirtualDUB

There are many way to compare these software, but to achieve better quality in your video the capturing average framerate is the most important factor during video capture. Your target video framerate will be 25 fps for PAL, 29.97 for NTSC. Anyhow you wont reach such high framerate within Second Life, but having a recording framerate higher than in world drawing framerate will smooth your video.

I the way to compare I've used the following technical environment for testing :
Dell Latitude D810 1Go RAM
Pentium 1.73 Ghz
ATI Mobility Radeon X600 (128Mo)
HD 7200 rpm
OpenSIM server 0.5.5 (best way not having inworld issue effect on testing)
SL Viewer 1.19

By far I've reached better result with VirtualDUB (11 FPS) using no codec. CamStudio (7 FPS), Taksi (4 FPS), WeGame (No information). Thus i mostly use VirtualDUB although CamStudio has nice features not available with VirutalDUB (as mouse highlighting and Screen Annotations).

Capturing Video Using VirtualDUB


VirtualDub is video capture and video editing software for Microsoft Windows. As you will see VirtualDUB is full of options and might be a lil bit complicated to understand. But none of freeware applications has such versatility.

Setting up VirtualDUB


As SL Viewer is a very high CPU consuming program you will produce better quality video while capturing with raw images with no compression than using lossless codec like CAM Studio. But doing that way you will a very fast HD (with DMA), capturing 788x576 frames will need around 27.23 MB/s capacity.

Open VirtualDUB and select File / Capture AVI... command

?Set capture Filename using File / Set capture file... (F2)
Choose internal harddisk (not external on USB)
Use any name you wish let's say capture1.avi for instance.

? In Capture menu enable both :
Hide display on capture
Autoincrement filename after capture

? In Device menu select Screen Capture

? In Video menu / Select Source
Use fixed offset X:0 Y:0
Check Capture mouse pointer image for a SL Tutorial
Depending of your capture scenario use following values:
AllMTAVTAVAV3D
Panning AreaWindowClient AreaClient AreaClient AreClient Area


? In Video Menu / Crop
Depending of your capture scenario use following values:
AllMTAVTAVAV3D
Capture Area Width788788788788788
Capture Area Height576576599628652


? In Video / Crop Menu
Depending of your capture scenario use following values:
AllMTAVTAVAV3D
X1 Offset00000
X2 Offset00000
Y1 Offset00232323
Y2 Offset0002953


? In Video / Capture... (C)
We wont use any codec while capturing. Select (Uncompressed RGB/YCbCr)


? In Capture / Settings... (F9)
As you wont reach 25 FPS using Second Life environment i use a lower framerate.
Set framerate (15) and round to nearest millisecond (14.9253)


? In Capture / Preferences... (F10)
Setup hotkeys you wish for starting/stopping video capture. I use [Ctrl]-[Alt]-[F6] and [Ctrl]-[Alt]-[F6] as it doesnt interfere with SL standard hotkeys.


Capturing Video


Now you are ready to capture your SL session. Launch SL Viewer, select appropriate Windows Size help to Sizer, use Start/Stop hotkeys for capturing. VirtualDUB will create autoincrement avi files.

Encode your video using VirtualDUB and ffdshow


As we use no Codec during video capture, video capturing files are not ready for being used into Video Editing Software.

ffdshow is a media decoder and encoder supporting numerous video and audio formats. It is free software released under the GPL license, runs on Windows and is implemented as a DirectShow and VFW decoding filter.

Download and setup ffdshow from ffdshow tryouts

Lauch second session of VirtualDUB and open your video capturing file.

? In Video / Frame Rate... (Ctrl+R)
Change frame rate to PAL compatible value : 25fps.


? In Video / Compression... (Ctrl+P)
Select ffdshow Video Codec


Select configure command
Ensure MPEG into AVI is setup in Decoder tab.


Adjust Coder paramaters into Encoder tab.
I personnaly use MPEG-2 4CC:MPEG Mode: 2 passes


Save your file usinf File /Save File... (F7)
Test the encoded video file with Windows Media Player or whatever media player you use.

Wednesday, June 25, 2008

Video Tutorial 1

This is first part of tutorial to help you capturing, editing, creating DVD from your Second Life session using mostly freeware and open source software.

Video Format


I won't go into deepest information about Video format, i suggest to read the excellent article of Chris Pirazzi Programmer's Guide to Video Systems. But take time to have a coffee before !!

In short for having a full quality video recording for a DVD PAL you will need to capture your video in 788x576 format (4:3 Square-Pixel) ; notice correct ratio should be 576x4/3 = 768; rescale it to 720x576 (4:3 Non-Square-Pixel) during the last MPEG2 coding of your DVD. However after all of this you will only see 702x576 pixels on your TV Screen. 788/768/720/702 : What for this hell ?

What size is a television picture ?


There are 576 active lines in a television picture (625 lines system). A 4:3 image would therefore be: 576 x 4/3 = 768 pixels wide.

However this assumes the pixels are square - but television pixels are not square (due, in part to the allocated bandwidth and Kell factors etc. ). They have an aspect ratio of approximately 1:1.094. A 4:3 television picture would therefore be: 768/1.094 = 702 non-square pixels wide

In the days of analogue television, the active part of a television line occupied approx 52 µs. When they came to digitize television, a sampling frequency of 13.5 MHz was the agreed compromise. If you multiply 52 µs x 13,5 MHz you get 702 samples per scan line. So a 4:3 television image is 702 pixels wide by 576 high.

The digital TV standard (originally known as REC 601) allocated 720 pixels per total line length. Digital pictures are effectively wider than analogue pictures by 18 pixels but the 4:3 image sits inside the 720 by 576 area. The additional 18 pixels are required for digital processing and it would be perfectly acceptable to leave them black - but if the image is shrunk via a digital DVE (Digital Video Effects), two 9 pixel wide black stripes will be seen at the sides.

These 18 pixels are of course not square, converting them to square pixels gives:
18 x 1.094 = 20 square pixels.

When making a 4:3 graphic on a square pixel device for conversion to a 720x576 (non square pixel) video image, the width of the 768x576 (square pixel) image must then be increased to:
768 + 20 = 788 square pixels.

Thus correct size of video capturing for a DVD PAL purpose is thus 788x576.

Windows Resizing


For having a precise capture of your Second Life session you will need to resize very precisely your Second Life viewer. Sizer tool of Brian Apps is the perfect tool to use.

If you size your Seconf Life Viewer to DVD PAL Capture Video Size 788x576, you will capture entire windows (Windows Frame, SL Menu and SL Toolbar). You may have situation you wanted to remove part of those elements from your capture (or not). You can also hide UI using Alt-F1 short keys of the viewer. To simplify everything custom arrangement of Windows UI have effect on Windows Frame Width & Height, Title Height of Non Client area.

Without any customization of Windows Default parameters, your SL Viewer will use the following dimensions:
  • Windows Frame Width 4 px

  • Windows Frame Height 4 px

  • Windows Title Height 30 px

  • SL Menu Height (18 px) + Shadow (5px) 23px

  • SL Toolbar Height 29 px

  • SL Audio Video Toolbar Height 24 px


Depending of your Video Capture needs (and for having a perfect capture windows of 788x576) you will have to resize your SL Viewer Windows with dimensions (Height & Width) specified bellow:

1 - Capturing All Interface 788x576


2 - Capturing SL Viewer MTAV (Menu + Toolbar + Audio Video Toolbar) without Windows UI 796x610. This scenario can be also used to capture 3D only when using [Ctrl] [Alt] [F1] Shortcut (Hide SL User Interface).


3 - Capturing SL Viewer TAV (Toolbar + Audio Video) without Windows UI 796x633


4 - Capturing SL Viewer AV (Audio Video) without Windows UI 796x662


5 - Capturing SL Viewer 3D without Windows UI 796x686


AllMTAV*TAVAV3D
Windows Width788796796796796
Windows Height576610633662686
X1 Offset04444
X2 Offset04444
Y1 Offset035535353
Y2 Offset0443357

* Or 3D with Ctrl-Alt F1 shorcut

We will use later the Offset values into parameters of capturing video software.

End of Video Tutorial Part 1 - Next part to come How to capture with Virtual DUB

Tuesday, June 24, 2008

Video Tutorial

This is a set of articles to help you capturing, editing video, creating DVD from your Second Life session using mostly freeware and open source software.

Part 1 - Video format and Windows sizing
Part 2 - Video Capturing

Monday, June 23, 2008

SkyBox Rezzer


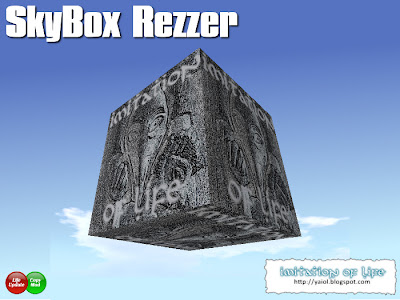
Greetings you have in your hand one of the most sophisticated SkyBoxes available on Second Life.

Free Edition


Where to begin


For using your SkyBox Rezzer just rez it on the floor and click on it. It is as simple! Default action associated to the SkyBox Rezzer is to sit on it.

In this help a clear distinction will be made between the SkyBox rezzer (the item present in your inventory) and the SkyBox itself, which is made of six variable sized panels.

Choose a Destination


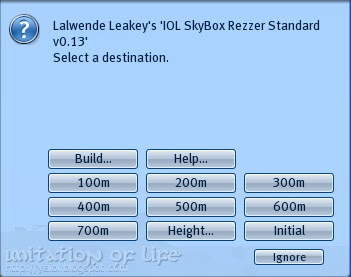
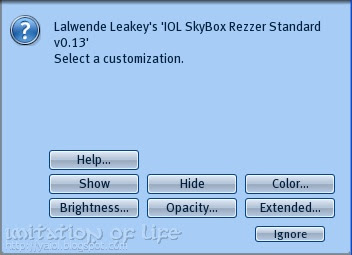
When you sit on your SkyBox Rezzer, the following dialog will popup:


Choose a destination among the seven ones proposed, and you will be instantanly teleported to the selected height. If you choose a destination below the current ground height, you will be warned and it won't operate.

Watch out, if your camera still focus on floor be aware to restore default focus using the Esc-key.

If the default height does not suit your needs, you may choose a custom one using the "Height..." command of the menu.

Verify actual place is well suited


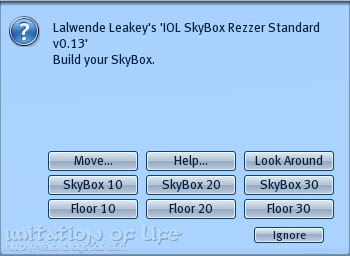
Once you have been teleported to the sky, following menu will popup:


The first step before rezzing-up the SkyBox, is to verify it will not interfere with other buildings next to your current position. You may use the "Look Around" command to make move your camera all around you scrolling from down to up.

If your current position does not suit you may choose another one using the "Move..." command to select an other height (see choose a destination).

When you are at the right location, build your SkyBox :
The SkyBox Rezzer is delivered with three sizes :

  • 10m using 6 prims
  • 20m using 6 prims
  • 30m using 54 prims

You can build an entire SkyBox or just the floor. Your choice might depend on what kind of work you would like to do.

Modifying the appearance of your skybox


Once your SkyBox has been build you may modifiy its appearance by directly clicking onto any of the walls, the following dialog will popup:


Show / Hide
Show / Hide commands allow you to hide / show the SkyBox rezzer.

Color
Color your SkyBox with one of the thirty predefined colors :
White, Black, Gray 80%, Gray 50%, Gray 25%, Dark Red, Red, Pink, Rose, Dark Violet, Violet, Lavender, Brown, Orange, Light Orange, Gold, Yellow, Light Yellow, Dark Green, Green, Sea Green, Bright Green, Light Green, Lime, Dark Blue, Blue, Light Blue, Pale Blue, Cyan, Indigo

Brightness
Brightness on is really useful if you like to have an uniform background without shadows, e.g. for taking pictures.

Opacity
Choose between one of the four level of opacity. Opacity only acts on interior walls, so you may see exterior environnment without being seen.

Extended
The extended menu allows you to apply a set of simultaneous customizations. The standard version is released with five customizations:

  • Blank - take away any texture from the walls;
  • Grid - applies a grid texture on the walls;
  • Scorpion - change your SkyBox using the Scorpion colors;
  • True Romance - you really should like Pink for this one;
  • Watermelon - using one a the great freebies Textures supplied by Torley Linden.

Using the Teleporter


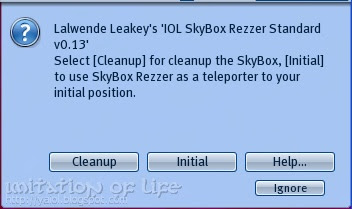
Once your SkyBox has been builded, the SkyBox Rezzer can be used as teleporter to your initial position at the ground. Click on the SkyBox Rezzer, it will position itself in the middle of the SkyBox, the following menu will popup :


By selecting the "Initial" command you will be teleported to your initial position at ground. Your SkyBox will remain builded in the sky. At any moment, you can come back in your SkyBox while sitting once again on the SkyBox Rezzer.

Cleaning up the skybox


When you will end up with your works, don't let everything rezzed. Remember to
delete your SkyBox. Click on the SkyBox Rezzer, it will position it self in the middle of the SkyBox, the following menu will popup :


By selection the "Cleanup" command, SkyBox panels will be unrezzed, you will be teleported to your initial position on ground, ejected from the SkyBox Rezzer and finaly it will unrezz itself.

Pro Edition


Following features are only availables on Pro Edition of SkyBox Rezzer. You can find this version going at our Shop

SkyBox Rezzer Pro has a set of advanced features allowing to personalize your SkyBox :

  • A set of commands for modifying the panels appearance (color, transparency, brightness & texture)
  • A script reading notecards so you can save your customizations and use it again at any time.
  • A mechanism allowing to store objects into the SkyBox Rezzer, those objects can be automatically
    rezzed and position themselves.

Alterting the .ini notecard


You can set up your SkyBox Rezzer Pro by altering a notecard in its contents called ".ini". Before editing this notecard, we strongly advise that you to make a backup copy in your inventory to refer to, in case your edited copy becomes corrupt.

For altering the ".ini" notecard, rezz the SkyBox Rezzer from your inventory or wear it. Next rightclick on the object and select 'Edit' in the pie menu. Click the "more" button if needed and select the "content" tab. Double click the ".ini" notecard to open and edit it.

Every command that work as spoken command (see below) can be used in the notecard. Any lines that begin with a double slash will be treated as comments and will be ignored.

Once you have finished editing the notecard, you must reset your SkyBox Rezzer Pro in order for the scripts to pick up the changes. You may do this by either:

  • Using the command Tools / Reset Scripts while it is selected
  • Using the following command : /3 reset

This will reset all the scripts in the device, which may take a few moments, depending on the speed of the sim you are currently in. Setting the customization directly in the SkyBox Rezzer .ini notecard also means that every customizations will be saved even if the SkyBox Rezzer scripts has to be reset.

Here is the .ini notecard shipped with your item:

// setting up the default channel
channel 3
// setting up the default skybox size
size 30
// setting up autodie feature
autodie on

Once you have finished your modification, unwear the SkyBox Rezzer.


Command channel


The SkyBox Rezzer can be controlled using spoken commands. These spoken commands are listed below and are given on a specific command channel (which can be set/changed via spoken command). The default channel is 3.

Command example:
/3 hide

For setting up a customized channel use command channel in your ".ini" notecard see above.

Standard commands


Here is a short list of command you can use
a parameter noted indicates an obligatory parameter
a parameter noted [parameter] indicates a facultative parameter, note that when specifying a facultative parameter all preceeding facultative parameters should also be set.

? channel
set current channel to specified one

? hide
hide the SkyBox Rezzer

? show
show the SkyBox Rezzer

? autodie
toggle autodie feature. onoff parameter should be one of the following value:
on : autodie feature is set
off: autodie feature is unset

? move
move the SkyBox Rezzer to specified height (in meters), if keyword 'ini' is used then move to initial position of SkyBox Rezzer
See previous paragraph "Choose a Destination"

? look
move your camera all around your actual place from down to up
See previous paragraph "Verify Actual Place Is Well Suited"

? size
set the default skybox size used by command build

? build skybox [size] [panels]
build a skybox using the specified size, if no size was specified the default size will be used (see previous command).

panels specify the panels being rezzed if no panels are specified all six panels will be rezzed. The panels should be defined using one of the following keywords :
. individually each panel : botton, top, north, south, east, west,
. all the walls using : walls
. all the walls + top : wallstop
. all six panels using : all

NB: bottom panel is always added to your panels definition, so /3 build skybox 20 walls will rezzed the 20 meters width skybox with no roof.

? cleanup
cleanup the SkyBox
See previous paragraph "Cleaning The SkyBox"

Customizing apppearance of Panels


You may customize the appearance of SkyBox panels using the following commands : alpha, color, bright, texture.

Each of these command use a similar syntax (first parameter allows you to specify which panels will be affected by the command):

cmd

The target should be defined using one of the following keywords :
. individually each panel : bottom, top, north, south, east, west,
. all the NSEW walls using : walls
. all the NSEW walls + top : wallstop
. all six panels using : all

example:
following command
/3 color north FFFF00
apply a yellow color on the north panel

Opacity
? alpha
Alpha parameter specify the opacity from 0 (transparent) to 1 (opaque)

Color
? color

You can use one of the following thirty predefined color:
white, black, gray80, gray50, gray25, dred, red, pink, rose, dviolet, violet, lavender, brown, orange, lorange, gold, yellow, lyellow, dgreen, green, sgreen, bgreen, lgreen, lime, dblue, blue, lblue, pblue, cyan, indigo

Or directly specify a RGB value using hexadecimal notation.

example:
following commands
/3 color walls 000080
/3 color walls dblue
will apply the same dark blue color on the walls

Brightness
? bright
toggles brightness, onoff parameter should be one of the following value:
on : target panels will be fullbright
off: target panels will reflect light depends of their slope and exterior light

Texture
? texture [repeats] [offset]
will apply texture to specified panels
repeats and offset should specified as vector (watch out don't use blank space(s) to separate values)

? texture stretch
when the keyword 'stretch' is used, the texture is streched to all the surface of panel, this is definitely usefull for the 30 meters with panels.

Create a customization notecard


You can assemble a set of customization commands in a note card. Every previous command should be used.
Create an empty notecard in your inventory, rename it using a dot as prefix.
Write as many commands you want (see below for an example), save it and drag it into to your SkyBox Rezzer.
Once done a new command will appear into the "Extended..." menu, you may also run the customization notecard while using /3 run . (Don't use the dot prefix)

Example: Here is the ".True Romance" customization notecard

// reset current parameters
alpha all 1.0
blank

// color all panels in pink
color all pink

// color roof dark red
color top dred

// texture wall with Torley "Romance Blossoms"
texture walls 382b577e-528c-c3ac-f786-47f125fc4138 <2.0,2.0,0.0> <0.0,0.0,0.0>

// texture floor with Torley "Battle Field of Love"
texture bottom da989136-dadd-74f9-e01c-017af2f0f670

Linking an object to the SkyBox Rezzer


Any object could be linked to the SkyBox Rezzer and rezzed via the "Extended..." menu. Here is the step by step guide for proceeding. Before altering your SkyBox Rezzer, we strongly advise that you to make a backup copy in your inventory to refer to, in case your edited copy becomes corrupt.

Preparing Object to work with SkyBox Rezzer

  1. Ask SkyBox Rezzer to give you "SkyBox Rezzer - Object" script using /3 give script
  2. Rez or Create and object that has at least mod/copy permission where ever you want in the SkyBox
  3. Drag " SkyBox Rezzer - Object" script into the object
  4. Take a copy of the object into your inventory
  5. Drag that copy into the SkyBox Rezzer


Record position of the object

  1. Ask SkyBox Rezzer to rez you object using /3 rez [ObjectName]
  2. The Object will rez one meter above SkyBox Rezzer
  3. Adjust position and rotation as needed
  4. When ready touch the object
  5. SkyBox rezzer should say something like : rez Object <1.712433,1.871674,0.456543> <-5.869953,-5.447683,-47.279331>
  6. Create a customization notecard and copy the result from your History Chat Window into that notecard. Drag that notecard into the SkyBox Rezzer.
  7. A new command will appeared in the "Extended..." menu
  8. By using it a copy of your original object will be rezed and position itself at right place
  9. When everything is fine take a copy of the SkyBox Rezzer into your inventory and use that copy next time


Tips:

  • You can mix appearence customization and object rezzing in the same customization notecard.
  • Rez as many objects you wanted.
  • When SkyBox is cleanup all objects rezzed are unrezzed.


Customize the SkyHome


Any SkyHome could be used instead of one shipped. Before altering your SkyBox Rezzer, we strongly advise that you to make a backup copy in your inventory to refer to, in case your edited copy becomes corrupt.

Preparing SkyHome to work with SkyBox Rezzer

  1. Ask SkyBox Rezzer to give you "SkyBox Rezzer - Object" script using /3 give script
  2. Rez your SkyHome
  3. Drag " SkyBox Rezzer - Object" into your SkyHome
  4. Take a copy of your SkyHome into your inventory
  5. Rename it to SkyHome
  6. Delete or rename original SkyHome in your SkyBox Rezzer
  7. Drag your modifie SkyHome into the SkyBox Rezzer in place
  8. Take a copy of the SkyBox Rezzer into your inventory and use that copy next time.


You may found SkyBox Rezzer
In Shop in world
On SL Exchange

Friday, June 6, 2008

Texture Organizer

Current release v0.15
Aide en Français
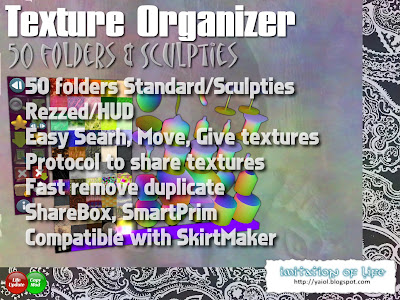


Texture Organizer helps to organize your textures very easily, visualize or retrieve them while preserving your inventory from any massive growth. You can assign your textures into any of the 50 buildin folders. Textures are viewable trough a 5x5 thumbnails grid (normal, magnified or tiled). Can be rezzed stand-alone or worn as HUD on any attachment point.

Here is a short summary of Texture Organizer features :

  • Mono compiled (Very Fast)
  • Copy/mod permissions (create as many Texture Organizer you want to store your collection)
  • Works as HUD (Simply wear it)
  • HUD with precise positioning, can be use with any attachment point, can be resized and minimized.
  • Automatically scales wether it is rezzed stand-alone on worn has HUD

  • Display up to 25 textures at once
  • Texture can me magnified or tiled
  • Unlimited texture capacity (successfully tested with 100,000 textures)
  • 50 folders for outstanding organization
  • Name folders
  • Move easily a single texture from one folder to another
  • Move easily all textures from one folder to another
  • Give texture individual, folder, or all folders
  • Delete individual texture or folder
  • Remove duplicate textures by UUID (unlike others two ways: unprecise fast, precise slow)

  • Search texture by name with partial matching term or not matching term
  • Search texture by creator

  • Sculpties visualization mode
  • Smartprim to easily create your sculpties or apply your textures on faces for standard prim. (Change Sculpt Stitching)

  • Shiped with a handy script to import textures stored into any mod box directly into your Texture Organizer

  • Share textures easily with any TO owners (give individual textures, folder or all)
  • Create share boxes easily (Give your textures easily to your friends)

  • Customize configuration notecard (channel, permissions)
  • When use stand-alone allow someone (avatar UUID), a group, or everyone to use device
  • Full help within Imitation Of Life blog

Use it on ground or wear it as HUD

Texture Organizer can be either rezzed on ground or be worn as a HUD. Anyhow you will use, it will autoresize to fit.
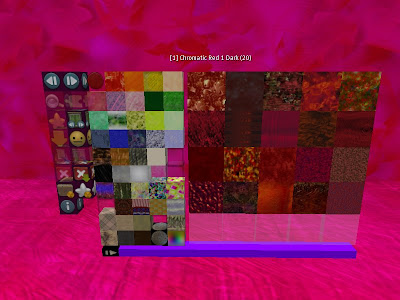
Rezzed on ground

You can attach Texture Organizer on any HUD attachment point. It reminds its position until you use another attachment point.

Using Texture Organizer as HUD prevents consuming prim on SIM, thus it might be the best choice for most use. Rezzing Texture Organizer on ground might be needed if you want to share the devices with others while building.
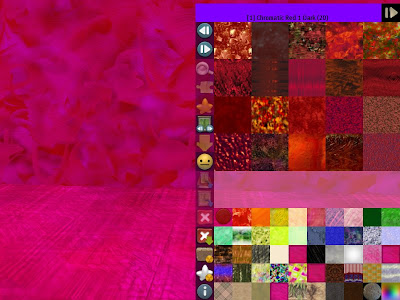

Worn as HUD

When used as HUD you can minimized Texture Organizer while clicking on upper right black square. To restore to standard user interface click on that box again.


Texture Organizer Interface
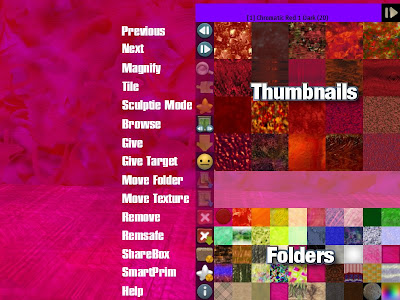


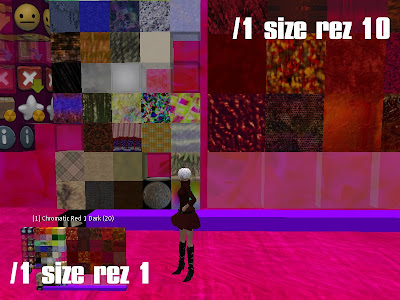
Texture Organize has three parts: on left side ten buttons that give access to most features, on bottom 50 folders containing unlimited number of textures, on top a panel of 25 thumbnails for viewing the textures.

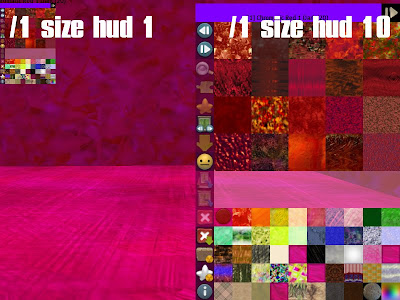
Resize your Texture Organizer


Adding textures to Texture Organizer folders


Well you probably in hurry to use your Texture Organizer with your own textures. First thing I would advice is to copy the empty Texture Organizer that is shiped in the pack and rename it to whatever is suited. Once done wear your copy as HUD.

Edit Texture Organizer. Be sure to have selected the "Edit Linked Parts" checkbox. When done select one of the empty folder (on bottom of your Texture Organizer when worn as HUD). Select "Contents" panel. Open your inventory and simply drag your textures (not the folder it won't work) from your inventory into the folder prim. Nothing else is needed.
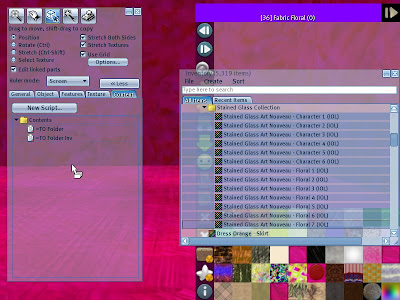


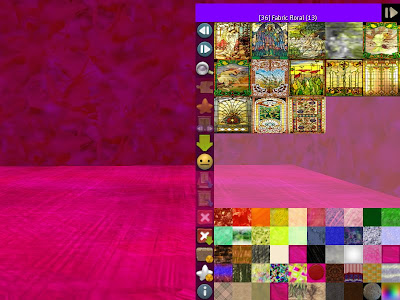
You can directly browse the new added textures.


You can also use a shortcut to directly drag textures from inventory into Texture Organizer folder, while holding [Ctrl] key and draging textures from inventory directly into folder. (You don't need to edit Texture Organizer at all).

Browsing through textures folders

For browsing through textures select the "Browse" button.
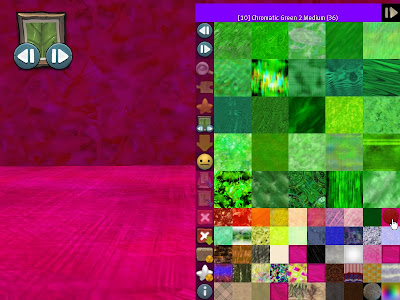


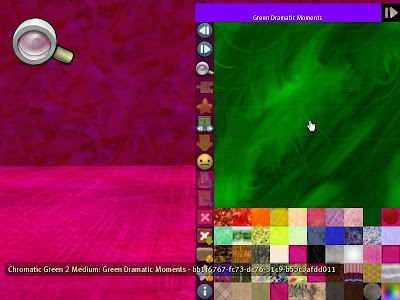
Click on a texture folder, for example the Green Medium. Texture Organizer show you on top blue bar some information on current selected folder : "[10] Chromatic Green 2 Medium (36)".

[10] is the number of folder,
Chromatic Green 2 Medium is the name of folder,
(36) is the number of textures into that folder.

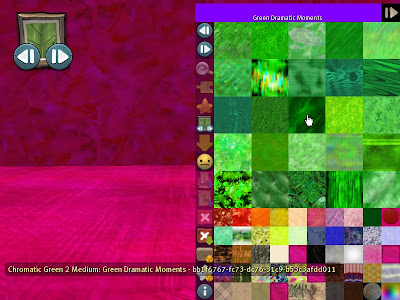
If you click on a thumbnail Texture Organize shows name and UUID of selected texture. "Chromatic Green 2 Medium: Green Dramatic Moments - bb1f6767-fc73-dc76-31c9-b53c3afdd011
"

If current bank contents more than 25 textures you can browse using the previous and next buttons.


Magnify & Tile

For magnify a texture use the "Magnify" button. When you will click a texture it will magnify using the 25 thumbnails. Click once again on any thumbnail to get back to previous view.


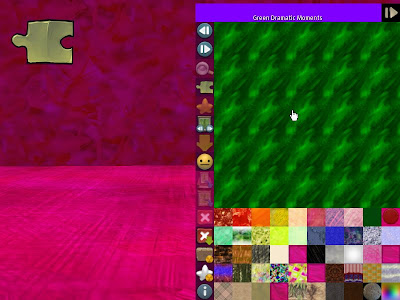
For tiling a texture use the "Tile" button. When you will click a texture it will tile it using the 25 thumbnails, click once again on any thumbnail to get back to previous view.


Searching through Textures

You can search within the current selected folder three ways:

/1= <term> to search texture with matching name
/1! <term> to exclude texture with matching name
/1c <term> to search by creator of texture

/1= will clear all active filter.

Select folder 43 and type on local chat /1= denim.
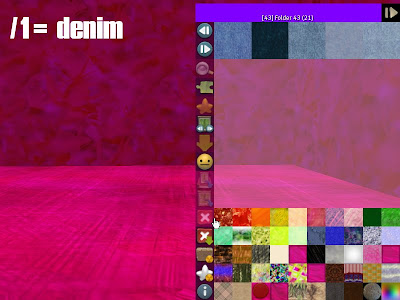

You will see the five Denim textures.

Type now /1! denim
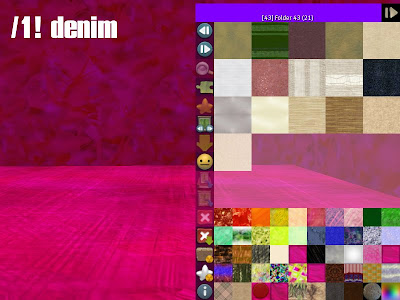

You will see all but the five Denim textures.

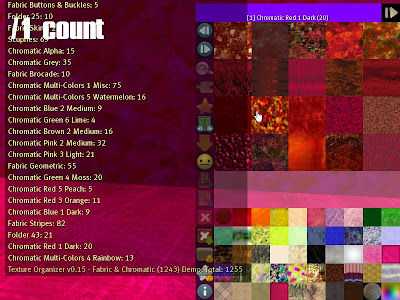
Counting the textures


How to apply a texture

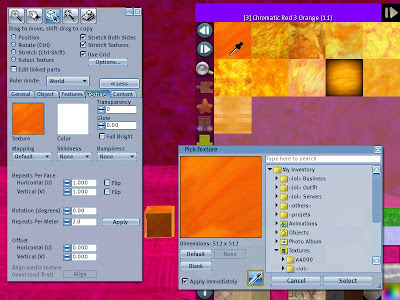
You can use Texture Organizer for applying textures directly to your prims. When using the "Pick Texture" Dialog select the "pipette" tool and pick the wanted texture currently drawn in one of the thumbnails. Due to a limitation of Second Life TM texture need to be into your inventory before using this feature. (See following chapter for uploading textures into your inventory).


Apply texture using SmartPrim


If you use SmartPrim you wont need any textures into your inventory. Click on the SmartPrim icon, a white cube will rez 2 meters upon you head. Click on any face this will turn the face into yellow.
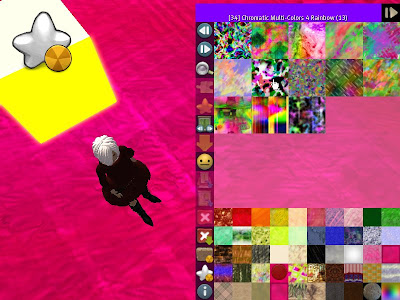


If you click on any texture it will be applied to all current "yellow" faces of all smartprim rezzed.
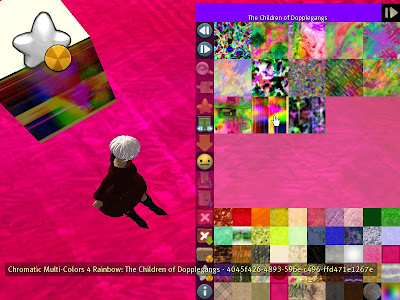


To select all faces of smartprim double click on any face.
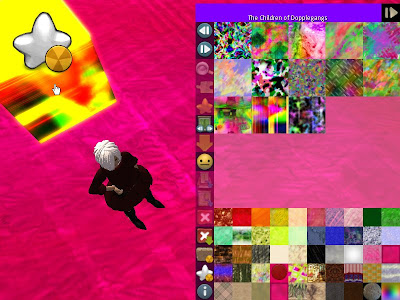


If you select another texture this one will be applied now to all faces.
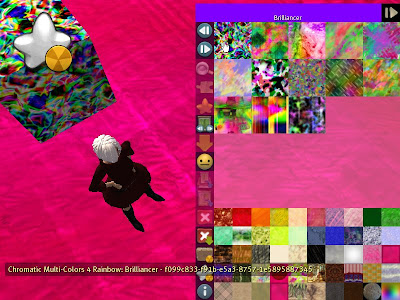


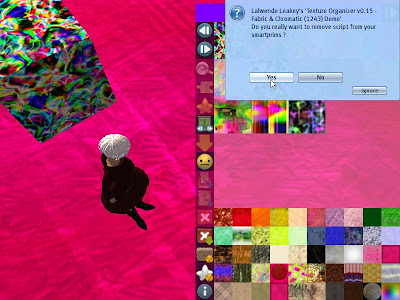
Once you apply all textures to all faces you can remove Smarprim script with command /1 spdone.


Uploading to inventory


If you want to upload textures into your inventory select the Give button just below the browse button.


You can upload either :
  • one specific texture,
  • one specific folder,
  • all textures of your Texture Organizer.


The icon next to Give indicates the target that will be used when copying textures. It can be yourself (your inventory), another Texture Organizer or a Sharebox.

Avatar Face means the target is yourself (textures will be uploaded to your inventory)
The TO icon means target is another Texture Organizer (textures will be copied to another Texture Organizer)
The "ShareBox" icon means current target is a ShareBox (textures will be copied into the ShareBox)
The "synchronise" icon means your Texture Organizer is receiving textures from either another Texture Organizer or a Box using "Import Textures" script


Uploading a texture

Now click on any texture you wanted. A dialog will popup to accept inventory offer. Click on "Keep" button.
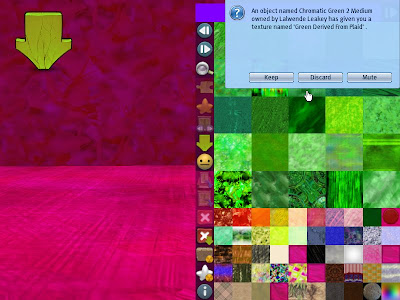


The previous selected texture is now into your inventory.
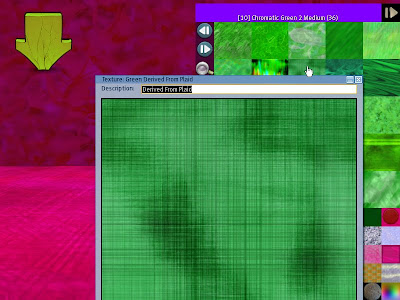

Uploading a folder


If you want to upload an entire folder you can click on folder. For example click on "Chromatic Multi-Colors 4 Rainbow: (13)" folder. As previously a dialog will popup to accept inventory offer.
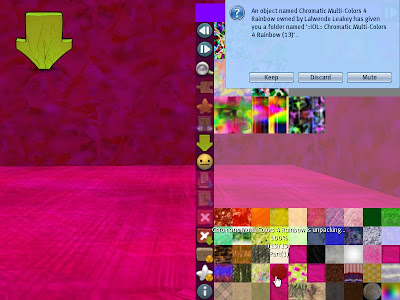

Open your inventory you will found the textures into the following folder "::iol:: Chromatic Multi-Colors 4 Rainbow (13)".

Uploading all folders

You can also uploading all folders at once while clicking the upper blue bar.


PS:Don't forget to click back on "Browse" button when ok.

Name of folders


You can easily setup name of folders while modifying the .folders notecard within your Texture Organizer and type /1 ren on public channel to apply.

.folders Notecard is defined as following:
  • on line for each folder using semicolon separated fields: [folder number];[folder name]
  • first line is used to setup the prefix that will be used when creating folder into inventory


.folders Example Notecard
0;::iol::
1;Chromatic Red 1 Dark
2;Chromatic Red 2 Medium
3;Chromatic Red 3 Orange
4;Chromatic Red 4 Yellow
5;Chromatic Red 5 Peach
6;Chromatic Pink 1 Dark
7;Chromatic Pink 2 Medium
8;Chromatic Pink 3 Light
9;Chromatic Green 1 Dark
...


Folder 1 will show Chromatic Red 1 Dark within Texture Organizer UI. If Uploaded the folder will be named "::iol:: Chromatic Red 1 Dark".

Moving all textures from one folder to another one

If you want to move all textures from on folder to another one. First select the source folder with "Browse command", click next the "Move All" button just below the "Give Inventory" button.
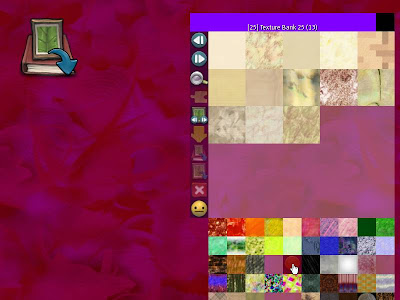


Now click to the desired target folder. A dialog will popup to accept move of textures from source to target folder. Click on "Yes" button to proceed.
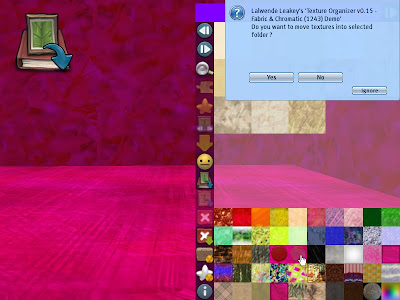


Now click black to "Browse" button and select the Target folder once again. You will see the textures has been transfered.

Moving one texture from a folder to another one

If you want to move all textures from on folder to another one. First select the source folder with "Browse command", click next the "Move Texture" button just below the "Move All" button.
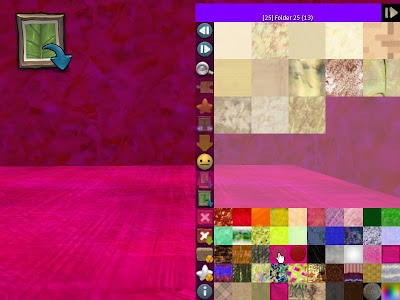


Now click to the desired target folder. It will glow in yellow.
Now any texture you will click on will be transfered from source to target folder. Let's try with clicking to some textures.
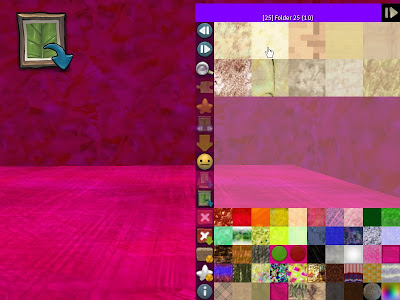


Now click black to "Browse" button and select the Target folder once again. You will see the previous clicked textures has been transfered.

Removing Textures

Manually remove textures

You can remove textures from your Texture Organizer using the 'Remove' button. By default Texture Organizer is using a remove safe state. To prevent lost of textures due to mistake, any textures will be upload to your inventory before beeing removede. If everything is ok you can then remove from inventory. If you made mistake you can still recover from inventory.
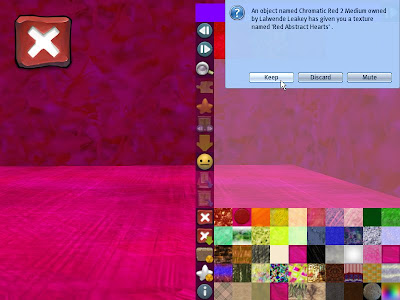
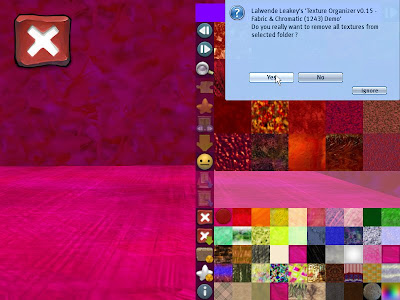


Automatic remove duplicate textures

Texture Organizer can find out duplicate textures in any of your folders and remove them. To have a test upload some texture of any folder and put them back into same folder as described in chapter Customize the textures folders.

There are two ways to remove duplicate textures, one is precise but need many tests, one is unprecise but need a lot less.
In both case it only delete texture with same uuid whatever their names are.

If you get a folder with N textures
The precise algorithm needs N*(N-1)/2 test
For a 100 textures folder means 5050 tests, for 1K folder means 500500 tests, for a 5K means 12502500 tests.
But it detect all duplicates, if two textures have same key but have a very different name then precise will detect

The quicker way is to assume duplicates have same name like "wood thing", "wood thing 1" and "wood thing 2"
The unprecise algorithm needs only N-1 test, but it will miss textures with same uuid and named very differently like "wood chestnut" and "chestnut wood"
For a 100 textures folder needs 99 tests, for 1K folder 9999 tests, for a 5K needs 4999 tests

For instance If you can test 100 uuid pair in a sec you will need 34 hours for a 5K with precise algorithm but only 50 sec with unprecise one.

Now the remdup is shiped with option
/1 remdup near (default)
/1 remdup precise


Type /1 remdup on public channel.
You will see that Texture Organizer will recognize all the textures that has been duplicated and will remove them.

Texture Organizer will warn something like this.

Texture Organizer v0.8 - Fabric & Chromatic (1180): Remove Duplicate: Scanning of Fabric Fur done, [44/50]
Chromatic Red 1 Dark: Remove texture Red Noctua Lavoid 1
Texture Organizer v0.8 - Fabric & Chromatic (1180): Remove Duplicate: Scanning of Fabric Geometric done, [45/50]
Chromatic Red 1 Dark: Remove texture Red Kerstin Velvet 2 1
Chromatic Red 1 Dark: Remove texture petalos02.jpg 1
Texture Organizer v0.8 - Fabric & Chromatic (1180): Remove Duplicate: Scanning of Chromatic Red 1 Dark done, 4textures has been removed [46/50]
Texture Organizer v0.8 - Fabric & Chromatic (1180): Remove Duplicate: Scanning of Chromatic Multi-Colors 1 Misc done, [47/50]
Texture Organizer v0.8 - Fabric & Chromatic (1180): Remove Duplicate: Scanning of Fabric Stripes done, [48/50]
...
Texture Organizer v0.8 - Fabric & Chromatic (1180): Remove Duplicate: All scanning done, 4 textures has been removed


Change remove safe state

You can disable the 'remove safe' state. If disabled the textures wont be uploaded during the remove operations.

For changing 'remove safe' state. Type on public channel either /1 remsafe off to disable or /1 remsafe on to enable.

Working with sculpties textures


TO offers two differents ways to work with textures:
  • a buildin visualization mode for using textures
  • smartprim a way to create sculpties prims directly from your TO


Sculpties Visualization Mode


The best way to use Texture Organizer with sculpties textures is to sort them into specific folders. Once you will set your folders with your sculpties textures you can use the "Sculpties" visualization mode.

For testing purpose folder 50 has been filled up with 69 sculpties textures. Select the sculpties folder and select "Sculpties" (Tthe yellow five branches star icon below Tile). Thumbnails will be replaced with sculpties prims. You will notice this mode works either when your TO is rezzed into world or worn as HUD.
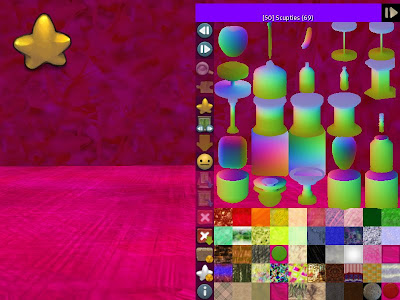


Smart Prim


You can also directly create your sculpties prims using SmartPrim feature. Click on the SmartPrim icon, a white cube will rez 2 meters upon you head. Click on any facce and this prim will use that texture as "Sculptie".
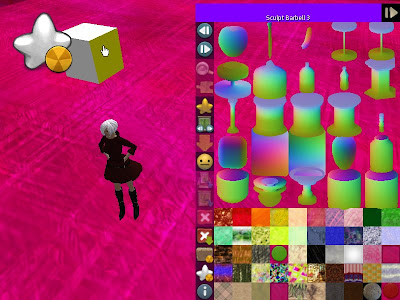
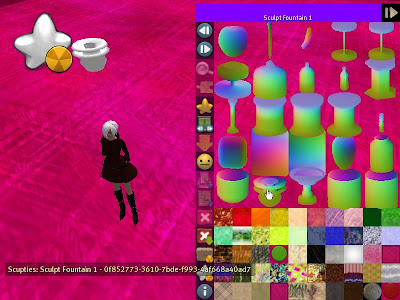


Sharing Textures between two Texture Organizer

You can share your textures with friends very easily with Texture Organizer. Last button show current target of giving operations. By default avatar icon advices the target is you.

If you click on that button and a friend near to you also worn a Texture Organizer, both will begin an exchange protocol. The one who initiated the protocol will be the sender, the one accepting the exchange will be the receiver.

You can next send either:
  • a single texture,
  • an entire folder,
  • even all textures in one operation


Initializing communication between Textures Organizers


To test the protocol exchange make a copy of Empty Texture Organizer and wear it to another attachment point (let's say top left). You should have two Texture Organizer on screen, on right side Fabric & Chromatic, on left side Empty.

Click on "Exchange" button of "Fabric & Chromatic", "Empty" will warn another Texture Organizer is initiating a exchange session Do you accept receiving textures from. Accept.
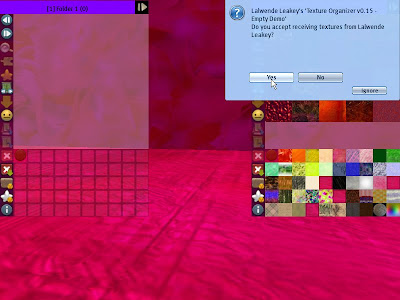


You will notice icons on both Texture Organizer will change, on "Fabric & Chromatic" a "Texture Organizer" icon indicates current receiver is another Texture Organizer. On "Empty" an sychronize icon indicates you will receive textures.

Give a single texture


Now on "Fabric & Chromatic" Texture Organizer click on any folder and select the "Give button". If you click on any texture, instead of uploading it into your inventory this texture is send to the current selected folder of the target Texture Organizer.

Give a folder


To give a folder click on any folder.
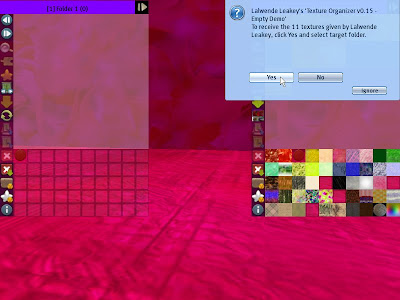

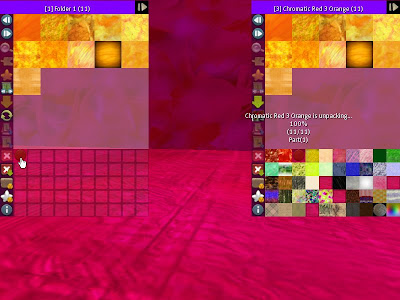
Receiver will warn "To receive the [x] textures given by [Friend], click Yes and select target folder. Accept and select target folder, all textures will be copied into it.


Give all textures


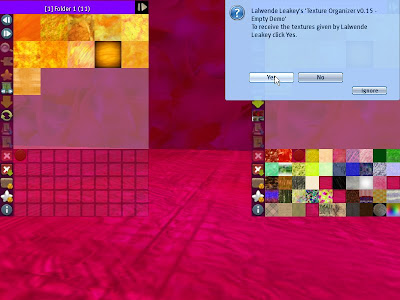
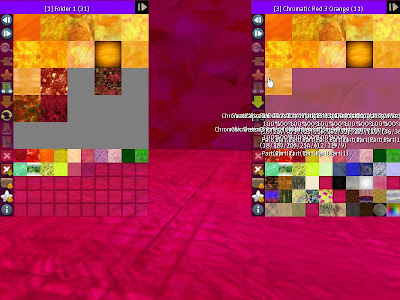
To give all textures click on upper blue bar.
The receiver will warn "To receive the textures given by [Friend] click Yes."


You may find Texture Organizer
Shop in world
Second Life Marketplace™