Current version 0.11
You can find the product on Second Life Market Place
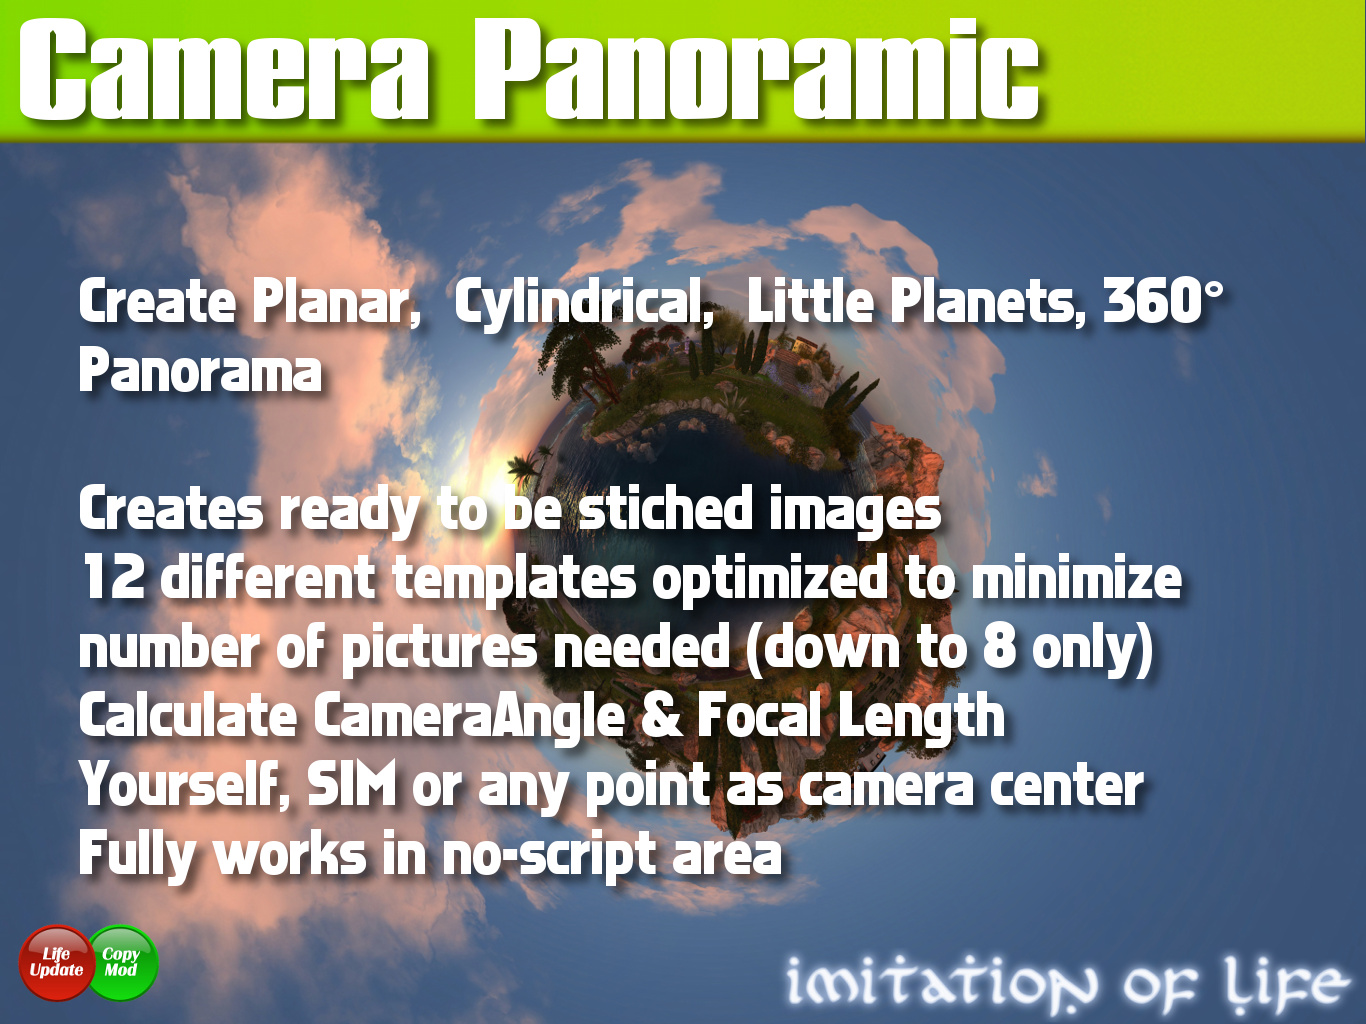
CamPano is a tool for capturing pictures ready to be used for creating planar, cylindrical or 360° panorama from Second Life. Once the capture has been made with it you will need to use panoramic creator tools such as Hugin, Microsoft ICE, Kolor Autopano, PTGui.
Type of panorama
CamPano can be used to create different kind of panorama
Cylindrical:
Pictures are projected onto the surface of a cylinder, then unrolled from the cylinder to make a flat plane.
Can be seen as planar picture or with cylindrical viewer
360° also called equirectangular
Pictures are projected onto the surface of a sphere, then unrolled from the cylinder to make a flat plane.
Can be seen with 360° viewer (flickr, facebook)
Taking snapshots with CAM Pano
Starting
Wear the CamPano HUD
Activate the 8 gestures
- CamPano F4 preview
- CamPano F5 start
- CamPano F6 stop
- CamPano F7 prev
- CamPano F8 next
- CamPano Ctrl+F7 prev
- CamPano Ctrl+F8 next
- CamPano F10 record camera position
User Interface
All commands of CamPano are accessible
- Using buttons on HUD
- Some commands are accessible using hot keys
- Using chat commands /3 command
- Using standard Second Life Blue Menu
Summary of main commands
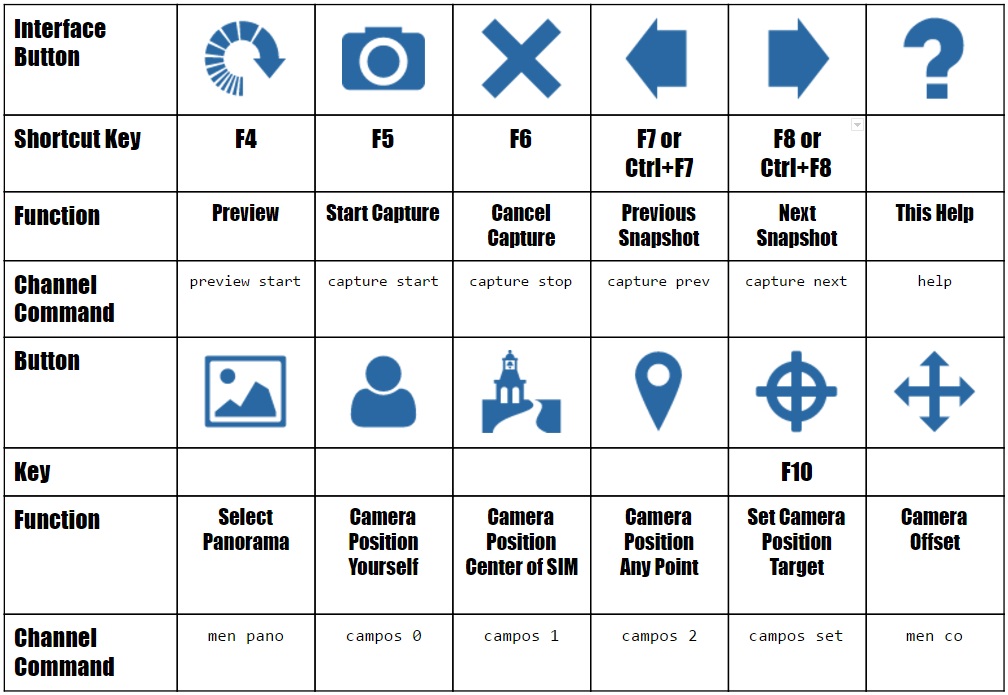
Selecting a panorama
Click on Select Panorama button

Select the Panorama you want to use.
For cylindrical
Cyl 4
|
Cyl 6
|
Cyl 8
|
Cyl 10
|
Cyl 12
|
For 360°
360 1 1x4/6
| ||
360 ° 2x3/8
|
360 ° 2x4/10
|
360 ° 2x5/12
|
360 ° 2x6/14
|
360 ° 2x7/16
|
360 ° 2x8/18
|
360 ° 3x4/12
|
360 ° 3x5/15
|
360 ° 3x6/18
|
Panorama templates
Cylindrical name is follow with one number P
P: Indicates the total number of pictures that will be taken.
360° name is followed with three numbers RxC/P
R: Indicates the number of rows of pictures that will be taken.
1: One rotation on horizon
2: Two rotations one 30° below horizon, one 30° above horizon plus two pictures on nadir and zenith
3: Three rotations one 60° below horizon, one on horizon, one 60° above horizon.
C: Indicates the number of pictures taken for each row
P: Indicates the total number of pictures that will be taken.
For example:
360° 2x6/14 two rows of six pictures + 1 nadir and 1 zenith is 14 pictures
360 ° 3x4/12 three rows of 4 pictures is 12 pictures
Which panorama using ?
If you want to create a cylindrical panorama select one of Pano template
If you want to create a 360° panorama select one of 360° template.
With Hugin, PTGui, Kolor Autopano you can use any Pano or 360°
If you use Microsoft ICE is better to use Pano 1: and 360° 3:.
Your criteria will be a compromise between two constraints
The more you have images the larger the panorama will be.
But :
- the more you have pictures within a set the harder it will be to stitch them together. Is one of reason why 360° real gears use very wide angle. Today many use only two lens.
- the more you have images the longer it will take to capture all the images and the more risk you have to have some desynchronization between different shots with an avatar or object moving during that moment.
If you are starting and are a bit lost with all those concepts simply pick the default 360° 3x4/12.
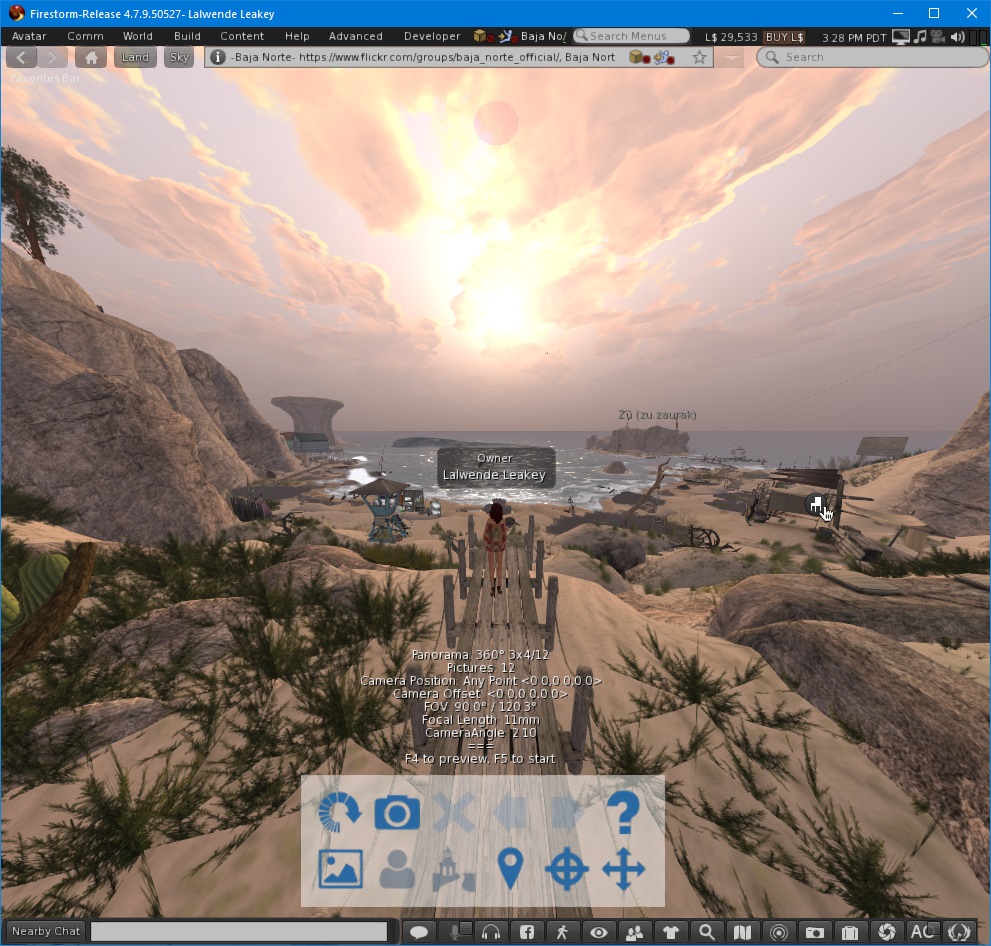
At any time CamPano show you important information.
Panorama: 360° 3x4/12
Pictures: 12
Camera Position: Yourself
Camera Offset: <0>
FOV: 90.0° / 120.3°
Focal Length equivalent: 11mm
CameraAngle: 2.10
Panorama
Is the current panorama you are using
Pictures
Number of pictures you will need to create the panorama.
Camera Position
You can center the panorama to either your avatar (default), center of SIM or any point you recorded.
Camera Offset
Is the camera offset toward the camera position.
FOV
Second number Is the minimal FOV recommended for the different pictures to stitch together including the overlap needed for stitching.
This information can be needed into some stitching Software to improve the detection of stitching points. See below.
Focal Length
Is the focal length equivalent of the FOV.
This information can be needed into some stitching Software to improve the detection of stitching points. See below.
CameraAngle
You will need to check your viewer CameraAngle is set at least with this value for not having holes within your panorama. This is a very important information, all the pictures taken should cover the whole surface of the projection your are achieving (a cylinder or a sphere). The fewer images there is within a panorama the larger the AOV (Angle of view) of each individual picture should be.
On Phototools CameraAngle is called View angle.
Preparing your viewer
Before taking the picture you will need to adjust several parameters
Resize SL Viewer Windows
For Cylindrical you don’t need to set a special size
For 360° is best to use a square view
Phototools / Aids / Set Window Viewer Size
Type directly the value 1024x1024

Set High-res snapshot
Menu Advanced
Select High-res Snapshot
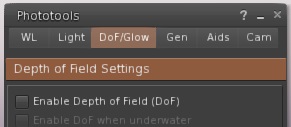
Disable DOF (Depth of Field)
Is very important you disable Depth of Field when taking pictures with Cam Pano. DOF depends on focus you have when you take pictures. As you want to create a panoramic and you will take a set of pictures this should be neutralized. If you want to create a DOF effect on your panorama is better to add some blurry effect on post production once the panorama picture is created.
You can either go into Preferences / Graphics / Depth of Field

Or use Phototools / DoF / Glow
Lock Windlight Sky Clouds Scroll
You need to minimize time desynchronisation of all snapshots you will do. You should have in mind that ideally all the snapshots should be made at exact same time, which is by nature impossible we don’t have a real 360° gear. This is one reason CamPano use gestures to allow you to be the faster possible when taking the snapshots. All can be made using keyboard only.
You can prevent the clouds to move by editing the windlight settings.
Phototools
Select WL Tab
Click on Edit Sky Preset button
Select Clouds Tab
Enable Cloud Scroll X and Cloud Scroll Y

Adjust the CameraAngle and Zoom speed
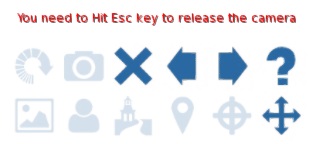
First type Esc to release the camera
For Second Life Official Viewer
If you don’t have the Advanced menu visible into your viewer type Ctrl+Alt+D
Menu Advanced / Show Debug Settings Ctrl+Alt+Shift + S
Modify value of CameraAngle to be at least as high than the CameraAngle shown on HUD

For Firestorm
Phototools / Cam
Modify value of View Angle to be at least as high than the CameraAngle shown on HUD
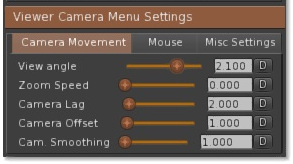
You can also tweak Zoom Speed here to reduce the latency between two snapshots.
Once you modify the CameraAngle you should see your viewer very deformed like this. Don’t freak, it will help to have a very accurate stitching at the end, nothing will be deformed into your panorama.
Preparing the camera
Camera position
 |  |  |
Yourself
|
Center of SIM
|
Any point
|
You can use three different kinds of camera position for the panorama
- Yourself
- Center of SIM, 20 meters over ground
- Any point you will record
Set the camera position target

If you chose to use a point for the camera position you will need to record it.
Simply move your camera anywhere you want and hit F10 to record it or use set camera position button.
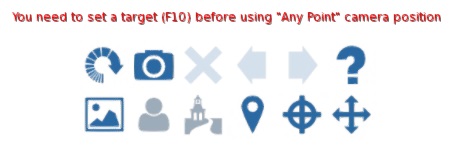
If you forget to set a camera position target Cam Pano will warn you.
Preview the capture

You can preview the capture hitting the F4 keys or use the preview button. It will browse through the entire set of images with a 0.5 second delay in between them. Can help to check if your camera position is good.
The delay can be customized edition the .ini notecard within the HUD contents.
Adjust the camera position offset

You can adjust the camera offset toward center position of camera using the Camera Offset button. A good way to see if you need to adjust it is to Preview the snapshots with F4.
For instance if you use yourself as camera position, by default the camera is centered on your avatar which is fine if you made your avatar invisible. But if you want your avatar to be part of the panorama then you will need to move away the camera from his default center, like 2 meters above or 2 meters forward.
Click on button [1.0] to loop between the three different value (0.1, 1, 10)
Then click on axe you want to modify.
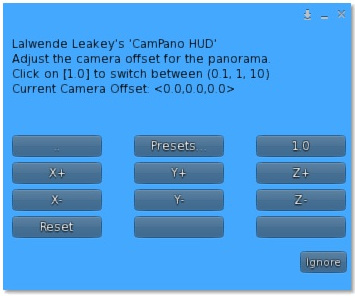
You can also pick a preset click on "Presets..." button
Presets are customizable to your needs with editing the .ini notecard into the HUD contents.

Selfies presets are meant if you want your avatar be part of the snapshot.
Make your avatar invisible
If you chose yourself as camera position and you don’t want your avatar to be part of panorama then will need to make your avatar invisible
Detach all your attachment
Wear “Invisible Avatar” transparent layer
Taking the snapshots
Now you can start taking the snapshots.

Hit F5 key to start the capture or click on start capture button.
On first image the HUD reminds you the important steps to do before starting. Double check you didn’t forget anything.
Resize SL Viewer Windows
High-res Snapshot
Disable DOF
Lock Windlight Sky Clouds Scroll
CameraAngle: 2.10
Zoom speed: 0.0
Release the camera
Before doing anything else you absolutely need to release the camera hitting Esc and let the HUD taking the control of the camera.
If you moved your camera using standard keys Shift+Ctrl+Mouse / Ctrl+Alt+Mouse or using a 3DConnexion SpaceNavigator and you forget to type Esc, then what you are doing is forbidding the HUD to take control of camera. Both (you and HUD) cannot have control of camera at same time.
So if you forget to hit the Esc key, Cam Pano will warned you with a error message. Simply hit Esc key to pursue.
CameraAngle
On first image Cam Pano reminds you to adjust the CameraAngle value. Be sure you double check you made the change to your CameraAngle, this parameter is tied to the panorama, if you don’t change it your snapshots won’t stitch together and you will have to redo the whole shots.
CameraAngle: 2.10
Keys
It also shows a short summary about function keys to use. Follow the HUD instruction attentively.
Ctrl+~ or F9: snapshots to disk
Ctrl+F7/Ctrl+F8 or F7/F8: prev/next snapshots
F6: cancel
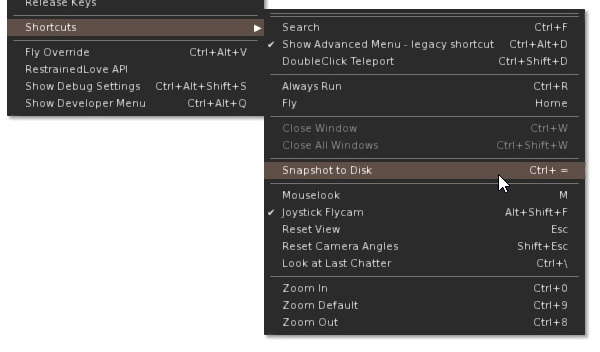
Snapshot to disk (Ctrl+~)
Default shortcut for taking snapshot to disk is Ctrl+~. Unfortunately this shortcut doesn’t work on most keyboard layout like french, spanish. So you will need to hack the viewer, before going further.
Your alternative is to use default keys for taking snapshot Ctrl+Shft+S, but this will make the process of capturing pictures very slow and not effective. A better way is to hack your Second Life viewer to use your own shortcut following the instructions given into paragraph Snapshot Key Ctrl+~ is not working end of page.
First time you hit Ctrl+~ Second life will ask you for folder and name of pictures.
Browse through pictures: Ctrl+F7/Ctrl+F8 or F7/F8


As you maybe noticed the default shortcuts for next and previous snapshots has been defined with and without Ctrl key. You will probably wonder why things are so complicated. You will not need two options but one of them.
If Ctrl+~ is working on your keyboard then you will hold a left hand finger on the Ctrl key to save snapshots to disk, the best option for you is to keep that finger hold on the Ctrl key and use Ctrl+F7/Ctrl+F8 to browse through snapshots.
On the other side if Ctrl+~ cannot work on your keyboard layout then you will need to chose an alternate key and hack the Second Life viewer. In that case F9 is a good option thus you will use F7/F8 to browse through pictures and F9 to save snapshots to disk. No need of using Ctrl key.
This is meant to speed up the capture process without having to alternate two shortcuts with and without Ctrl key.
Use the gesture that suits your case, and you can still activate both with Ctrl and without Ctrl version, will work.
Repeat Ctrl+F8 and Ctrl+~ until you captured all your pictures.
At any point you can go back to previous points using Ctrl+F7 key.
Cancel

You can cancel the capture hitting F6 or clicking cancel button.
Once you’re done you should end with a set of pictures that cover the scope of the panorama
You are ready to use the stitching software to create your panorama. We will see this into a second chapter.
No scripting zone
If you plan to use Cam Pano into a no-scripting zone all you need to do is to wear the HUD into a scripting zone and teleport to that non scripting zone then. Product will work exactly the same as the zone was allowing script.
Snapshot Key Ctrl+~ is not working
If the default shortcut for taking snapshot Ctrl+~ is not working because of your keyboard layout. You will need to hack your viewer settings files to replace the default shortcut with your own. One good option is to set it to F9 thus is very easy to take the snapshots.
F5 to start
Then alternate F9/F8
F9 to save snapshot to disk
F8 to get to next picture
Exit Second Life
Go to your viewer program files folder on the viewer you want to modify.
Depends of the viewer you are using
- For standard Second Life viewer
C:\Program Files (x86)\Second Life\skins\default\xui\en - For firestorm x32
C:\Program Files (x86)\Firestorm\skins\default\xui\en - For firestorm x64
C:\Program Files (x86)\Firestorm\skins\default\xui\en
Make a copy of the original file menu_viewer.xml to menu_viewer.xml.bak in case you want to restore original file.
Edit menu_viewer.xml with any text editor
Search for string Snapshot to Disk
Line 2954 for Firestorm 4.7.9
Replace the value between quotation shortcut="control|~" the key you want to use.
label="Snapshot to Disk"
name="Snapshot to Disk"
shortcut="F9"
use_mac_ctrl="true">
function="File.TakeSnapshotToDisk" />
Save your modification and start Second Life Viewer
You can check new settings are recognize opening Advanced / Shortcuts menu